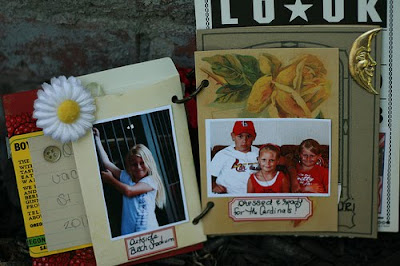
I used this method to create my “Down on the Farm” mini album using the Mercantile June Papercrafting kit and Atrium Add-on.
A video illustrating how to make this mini-album can be found on youtube at:
www.youtube.com/watch?v=eZYu3ahRd7c How to make the 9-square Haven Mini Album
This mini album is made from one piece of Haven Mini Pattern Cardstock. These directions will show you how to score, fold, cut, and re-fold a single sheet of cardstock to make an adorable mini album with a cover, back cover, 6 interior pages, and 2 pockets for tags.
Directions:
1. Place the sheet in front of you so the B-side of the Haven Mini Pattern cardstock is facing up. This is the side that will form the mini album.
2. Cut off the bottom name strip.

3. Score along the 9 mini paper designs. Fold along the score lines to make nice creases.


4. Make 2 small cuts as shown.

5. Holding the B-side towards you, fold the bottom row of squares underneath and to the back of the cardstock.

6. Fold the middle row in on itself so the “Album” page is in front to form your cover.


7. Fold the remaining 2 pieces towards you to form a back cover. The page you fold last will become the back cover of the album.


8. Fold the back cover down behind the album.

You now need to adhere pages together to form the front pocket and back cover:
9. Glue the right side of the front cover together so you form a top-loading pocket.

10. The second page has a pocket already and no gluing is necessary.
11. The Dictionary patterned page can be adhered to the page behind it.

12. The back pages are glued together so you have one back cover (made of 3 squares).

You now have the base of a mini album created from a single 12x12 piece of cardstock. Have fun adding photos, tags, and embellishments!
 I finally got my beach mini up to date this weekend and I thought I would share just one more thought about it with you here. If you'll recall, this mini album chronicals my son's tri-annual trips to the beach where I grew up. I think this is a wonderful way to get a glimpse of how he's growing and changing before my eyes.
 Since it is a work in progress and I plan on adding more years to it, I have prepped my product to do just that. I created the album with the DeLovely Kit. As I mentioned before, I really like consistency in my mini-albums, so I want to continue to use the same product throughout.
 Instead of leaving big sheets of paper and bulky embellishment sheets clogging up my stash, I went ahead and trimmed down the paper to fit in the album. I also went ahead and punched enough seaweed (martha stewart large snowflakes punch) and coral flowers (martha steward hydrangea punch) to last and collected just the bits of chipboard, stickers, and paper labels that I thought I would use. I thought about including the rest of the buttons as well, but I know that I always have buttons in my stash and so decided not to have those bulking up my embellishment bag. I've now just attached the embellishment bag to the back of the mini-album with masking tape and I'm ready to add a page quickly the next time we visit Florida.
 You can find links to the rest of this mini-album HERE. I hope it inspires you to document your vacations. - Doris Sander :)


